

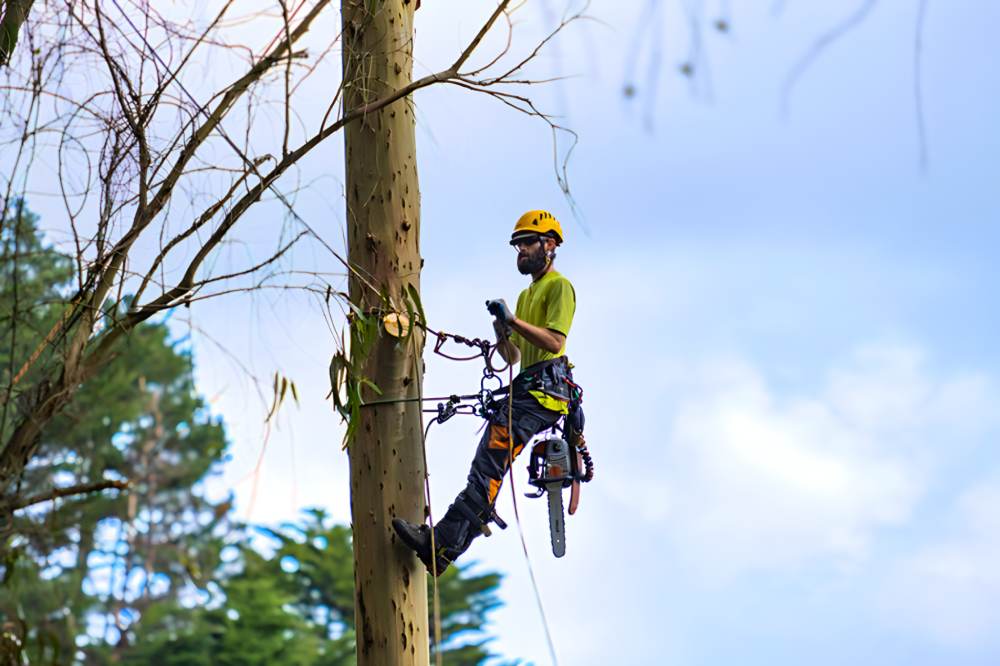
Arborist Now provides expert tree pruning, removals, and risk assessments for homes, HOAs, and commercial properties throughout San Francisco and the Bay Area. Safety-driven crews.
Your Premier Choice
for Tree Care Services
in the San Francisco
Bay Area
Top-rated on Google and Yelp
Read what homeowners and property managers say about our communication, safety practices, and the quality of the finished work.
Posted onTrustindex verifies that the original source of the review is Google. I put off having our Japanese maples pruned for YEARS because I was so afraid someone might butcher them, but the skillful arborists from Arborist Now did such a beautiful job, my trees still look like their lovely selves, only better and healthier. They not only came on time as promised and were delightful to work with, they really impressed me with how much they knew about managing older trees and keeping them in good health. After working with Arborist Now, I would never call anyone else.Posted onTrustindex verifies that the original source of the review is Google. Have called upon Arborist Now to take care of trees in my backyard for several years now. Super professional and reliable team. Get the job done, clean up before leaving. Would definitely recommend.Posted onTrustindex verifies that the original source of the review is Google. Excellent work beginning to end. Very helpful assessment from arborist as to which trees needed intervention and what kind, if any. Trimming/removal team showed up on time, worked diligently and cleaned up after themselves. Trees look much better, particularly well thinned out, reassuring given the heavy winds that we have been having. I enjoy doing my own yardwork as much as I can, but this time clearly needed professionals and glad to work with this company again.Posted onTrustindex verifies that the original source of the review is Google. They are professional. They show up on time, work efficiently, don’t tear up the yard….and they are also really friendly. Remy is a great guy and so was Jeremiah (crew lead) and the team.Posted onTrustindex verifies that the original source of the review is Google. Scheduling an appointment was easy; done in two stages. The first was a very prompt return of a phone call to have an in- person free estimate. The second was a call back to set the work schedule. An email contained the estimates for each task, and we emailed back the consent for the total estimate. We had used this service last year and a number of years before that. All appointments were kept on time. The work proceeded quickly, and removal of debris was thorough and efficiently done. Remy and the crew were pleasant and helpful. Will use again next year.Posted onTrustindex verifies that the original source of the review is Google. Arborist Now is great! The team was punctual, efficient, and friendly. Got the job done in no time.Posted onTrustindex verifies that the original source of the review is Google. We have worked with Remy and his excellent crew for many years and have always been thrilled with the timely, professional service and their obvious care for our trees. We are fortunate to have found them, after many weird experiences with other arborists. They are extremely pleasant to work with, responsive and knowledgeable. Worth every penny!Posted onTrustindex verifies that the original source of the review is Google. Arborist Now has done several tree trimming jobs for me over the last few years. They do exactly what I ask - great results and reasonable pricing. I recommend them highly.Posted onTrustindex verifies that the original source of the review is Google. HIRE THIS COMPANY!!! 5 STARS ARE NOT ENOUGH! Arborist Now did THE BEST JOB EVER topping a hawthorn tree in our neighbor's backyard (our very kind neighbors allow us to keep our view). The crew was on time and professional. Remy, who initially came out to bid the job, joined the crew at the beginning to review everything. The job wasn't easy. We needed the tree trimmed, and our newly landscaped, hillside yard, with a new and pristine deck, to remain unharmed in the process. One member expertly topped the tree, then the second member reached over two fences with an extension gripper to collect the branches, and expertly placed them on our canvas covered deck. Member number 3 filled a plastic trash can with the limbs and hauled the can on his back up three flights of stairs out of yard. Multiple times! The tree looks AMAZING!!!!! The best topper job ever in 6 trimmings.
20 Years of Professional Tree Care in the San Francisco Bay Area
Arborist Now has provided professional tree care throughout San Francisco and the Bay Area for over two decades. Our certified arborists deliver pruning, removals, risk assessments, and urban wood milling with a focus on safety, regulatory awareness, and long-term tree health.
Certified, Insured & Licensed.
Our team is fully certified, insured, and licensed to perform residential and commercial tree work. We operate with strict safety standards and documentation appropriate for Bay Area properties and municipalities.
Milling Services to Upcycle
When tree removal is necessary, we offer on-site milling to transform urban wood into usable slabs and lumber for furniture, construction, or custom projects—preserving value and reducing waste.

Our team works with the Bay Area’s diverse tree species and property types every day. From residential pruning and removals to plant health care, consulting, and urban wood milling, we deliver services designed for local conditions, regulations, and long-term landscape health.
Frequently Asked Questions
When is the best time to prune my trees and how often?
Pruning timing depends on the species and your goals. Deadwood and safety pruning can be done year-round, while structural pruning is often scheduled seasonally. We recommend annual inspections to keep trees healthy and prevent larger issues.
Are you licensed and insured?
Yes. Arborist Now is fully licensed and insured, and our team includes certified arborists serving San Francisco and the Bay Area.
Are there any specific permits or permissions required for tree removal?
Some tree removals in San Francisco and surrounding cities require permits. We’re familiar with local regulations and can guide you through the process to ensure compliance.
Do you provide free estimates?
Yes. We provide free, on-site estimates so we can assess the tree, discuss your goals, and provide a clear scope of work.
Can you set me up on a yearly tree maintenance program?
Yes. We can create a customized annual maintenance plan based on your property and tree health goals, with scheduled visits and proactive care.
Contact Us Today
for a Free Estimate
We’re based in San Francisco and serve the surrounding Bay Area. If you’re outside our usual coverage, reach out—we’ll confirm availability and the right scheduling option for your location.